How to Configure Windows RADIUS and UniFi Controller
Implementing 802.1X wireless authentication with Windows NPS (Network Policy Server) and UniFi access points provides enterprise-grade security for your wireless network. This updated guide for 2026 covers Windows Server 2022/2025 and the latest UniFi Controller.
Architecture Overview
┌─────────────┐    ┌─────────────┐    ┌─────────────┐    ┌─────────────┐
│   Client    │◄──►│   UniFi     │◄──►│  Windows    │◄──►│   Active    │
│ (Supplicant)│    │     AP      │    │    NPS      │    │  Directory  │
└─────────────┘    └─────────────┘    └─────────────┘    └─────────────┘
     802.1X              RADIUS            LDAP/AD
    EAPOL               UDP 1812
Prerequisites
- Windows Server 2022/2025 (Domain Controller or Member Server)
- Active Directory Domain with user accounts
- UniFi Controller (self-hosted or cloud key)
- UniFi Access Points with latest firmware
- Network connectivity between APs and NPS server
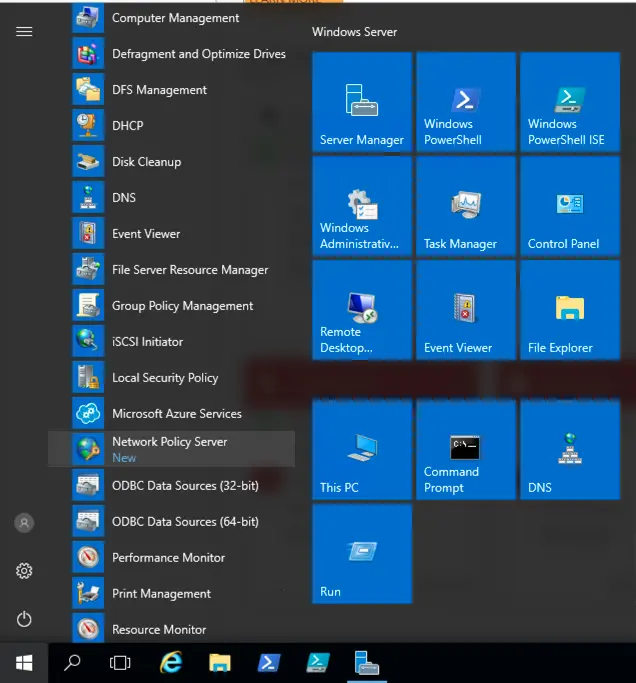
Install the NPS Server Role
Using Server Manager
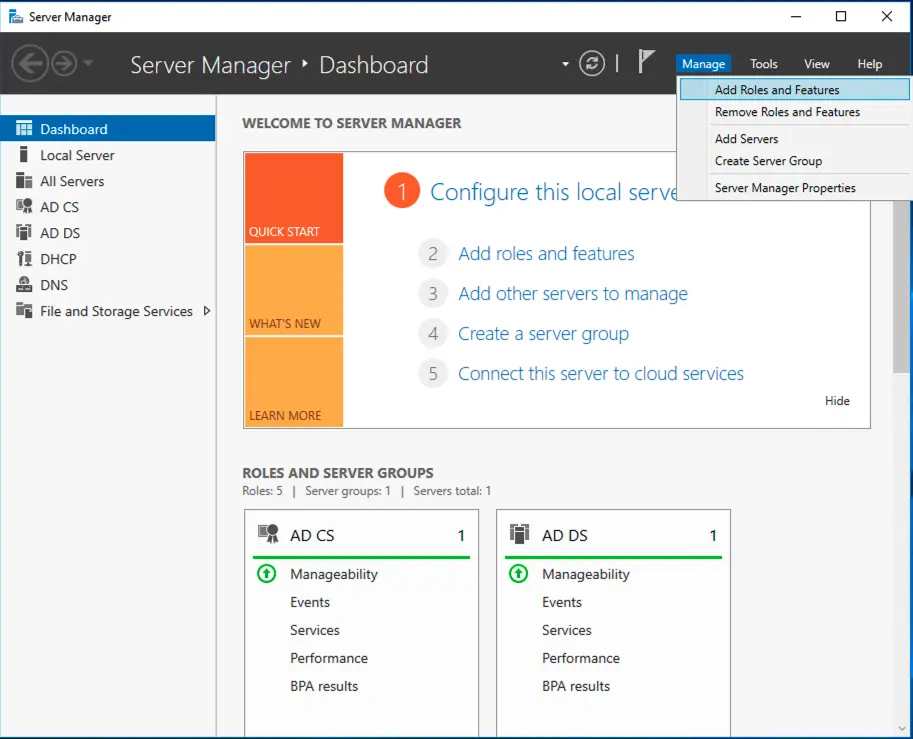
- Open Server Manager → Manage → Add Roles and Features
- Click Next through the Before You Begin screen
- Select Role-based or feature-based installation
- Select your server from the pool
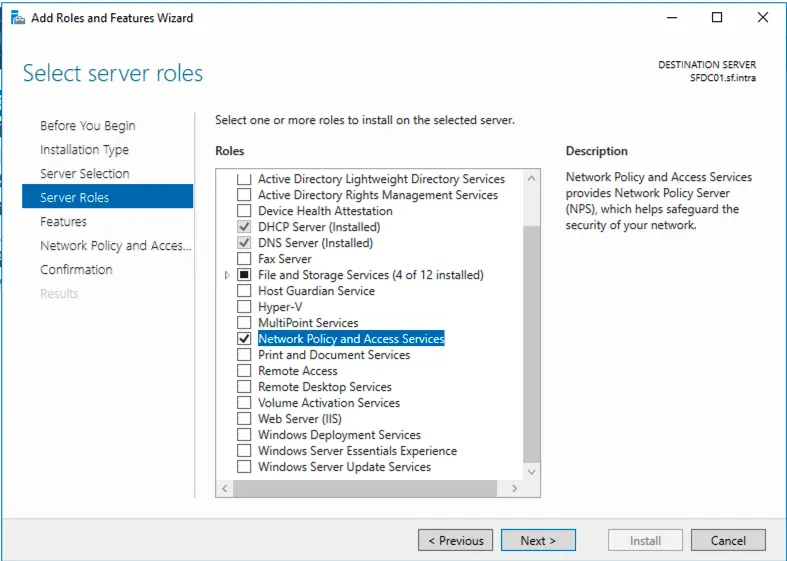
- Check Network Policy and Access Services
- Click Add Features when prompted
- Click Next through the Features screen

- On the Network Policy and Access Services screen, click Next
- Ensure Network Policy Server is checked under Role Services
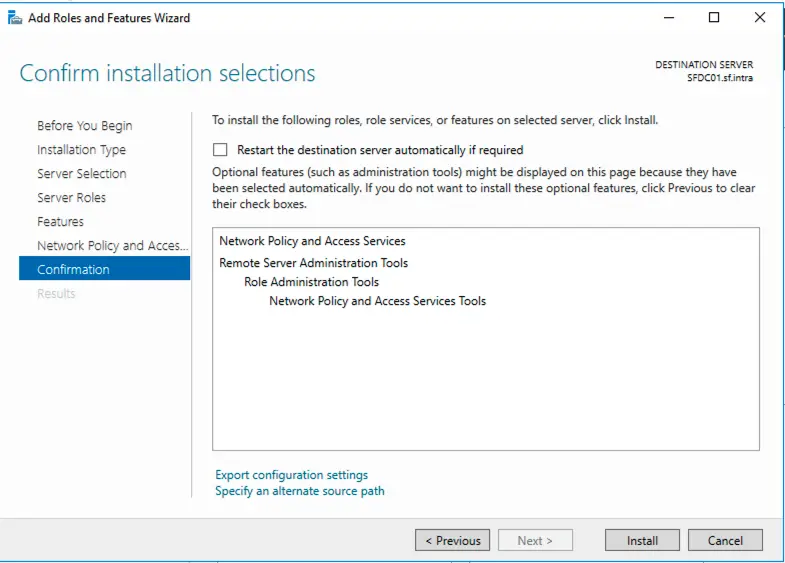
- Click Next and then Install
Using PowerShell
# Install NPS role
Install-WindowsFeature NPAS -IncludeManagementTools

# Verify installation
Get-WindowsFeature NPAS

# Register NPS in Active Directory (if not done automatically)
Register-Server -Server "localhost"
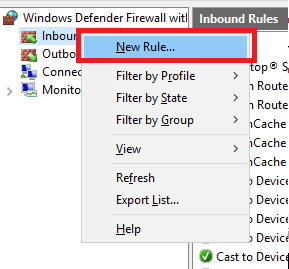
Configure Firewall Rules
Using Windows Defender Firewall
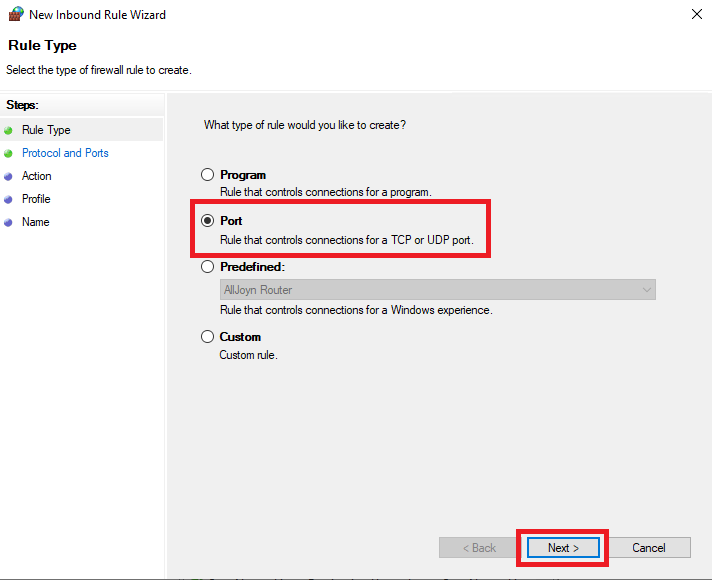
Open Windows Defender Firewall with Advanced Security and create inbound rules:
- New Rule → Port → Next
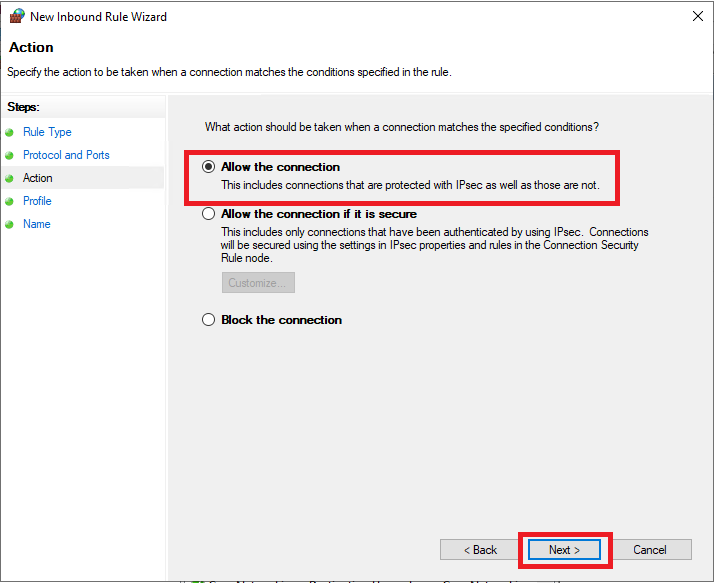
- Select TCP and enter port 1812
- Select Allow the connection
- Apply to appropriate profiles (Domain recommended)
- Name: “RADIUS Authentication (TCP)”
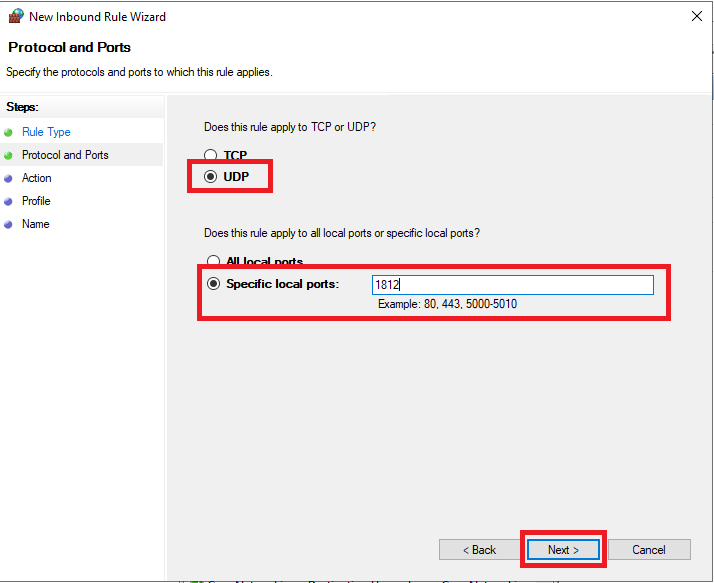
Repeat for:
- UDP 1812 (RADIUS Authentication)
- UDP 1813 (RADIUS Accounting)
- TCP 1813 (RADIUS Accounting - optional)
Using PowerShell
# Create firewall rules
New-NetFirewallRule -DisplayName "RADIUS Authentication UDP" `
  -Direction Inbound -Protocol UDP -LocalPort 1812 -Action Allow

New-NetFirewallRule -DisplayName "RADIUS Accounting UDP" `
  -Direction Inbound -Protocol UDP -LocalPort 1813 -Action Allow

New-NetFirewallRule -DisplayName "RADIUS Authentication TCP" `
  -Direction Inbound -Protocol TCP -LocalPort 1812 -Action Allow

New-NetFirewallRule -DisplayName "RADIUS Accounting TCP" `
  -Direction Inbound -Protocol TCP -LocalPort 1813 -Action Allow

# Verify rules
Get-NetFirewallRule | Where-Object {$_.DisplayName -like "*RADIUS*"}
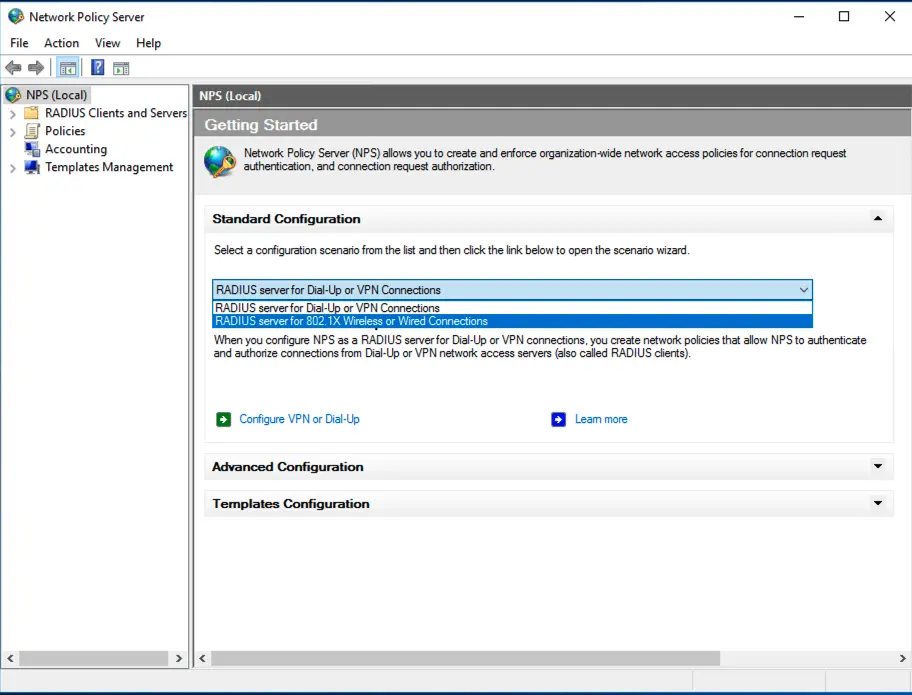
Configure NPS Server
Launch NPS Console
Open Network Policy Server from Server Manager or run:
nps.msc
Register NPS in Active Directory
If not already done:
- Right-click NPS (Local) in the left pane
- Select Register server in Active Directory
- Click OK to confirm
Configure 802.1X Wireless Network
- In the NPS console, click NPS (Local)
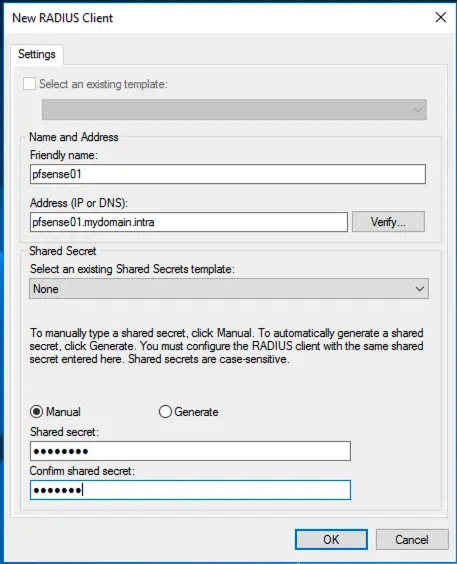
- Select RADIUS Clients and Servers → RADIUS Clients
- Right-click RADIUS Clients → New
Add UniFi Access Points as RADIUS Clients
For each UniFi AP (or use a network range):
| Field | Value |
|---|---|
| Friendly name | AP-Floor1-01 (descriptive name) |
| Manufacturer | UniFi (or Any) |
| Address (IP or DNS) | 192.168.1.10 (AP IP address) |
| Shared secret | [Generate a strong secret] |
| Confirm shared secret | [Same secret] |

Best Practices:
- Use a unique shared secret per AP or AP group
- Minimum 22 characters with mixed case, numbers, and symbols
- Store secrets securely (password manager)
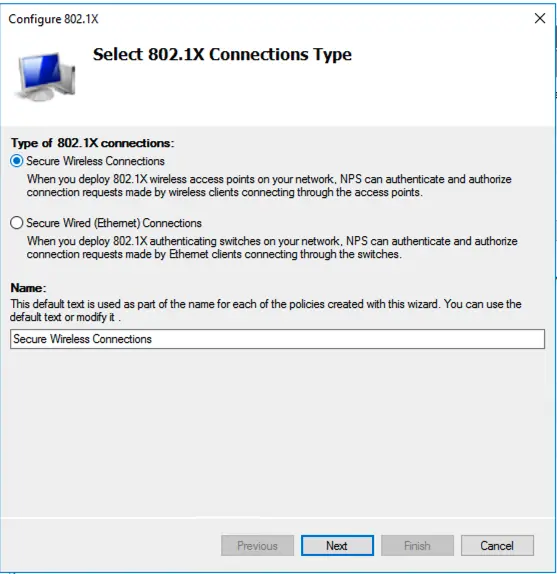
Configure Network Policies
- Right-click Network Policies → New
- Select RADIUS server for 802.1X Wireless or Wired Connections
Policy Configuration
Specify 802.1X Switch or Wireless Access Point:
- Select your APs from the list or add new ones
Specify RADIUS Client:
- Select the RADIUS clients you configured
Configure Authentication Methods:
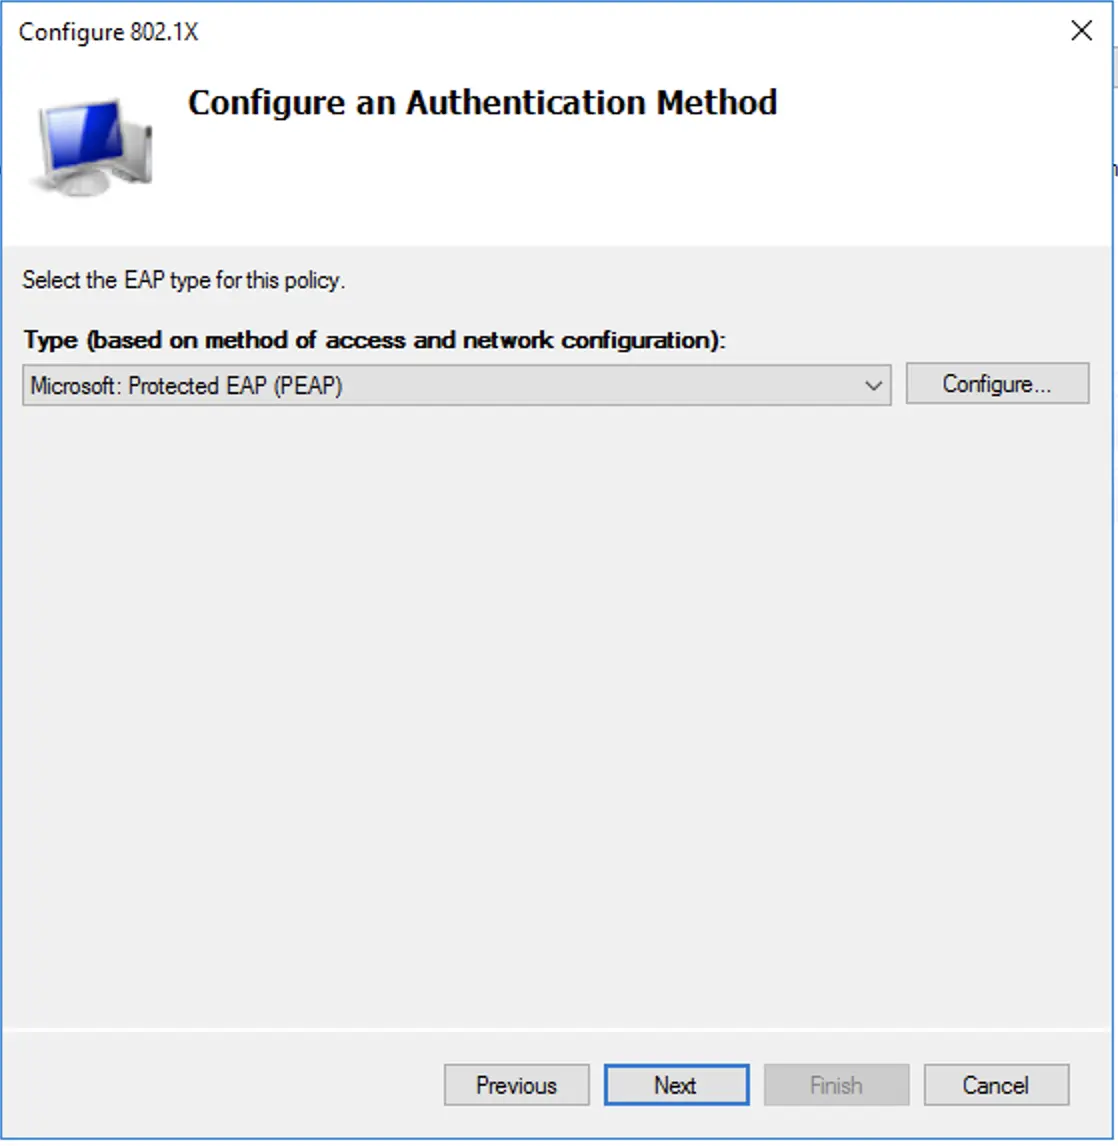
Recommended settings for 2026:
| Method | Setting |
|---|---|
| Microsoft: Protected EAP (PEAP) | Enabled |
| Microsoft: Smart Card or other certificate | Enabled |
| EAP Types | EAP-TLS (recommended) or PEAP-MSCHAPv2 |
For PEAP-MSCHAPv2:
- Uncheck “Enable Fast Reconnect”
- Click “Configure” and ensure server certificate is selected
- Uncheck “Enable Identity Privacy” unless required
For EAP-TLS (Recommended):
- Select your CA certificate
- Enable “Use Windows Hello for Business” if applicable
Configure Constraints
| Constraint | Recommended Setting |
|---|---|
| Authentication Methods | PEAP or EAP-TLS |
| Idle Timeout | 30 minutes |
| Session Timeout | 8 hours |
| Called Station ID | Restrict to specific SSIDs if needed |
| NAS Port Type | Wireless - IEEE 802.11 |
Configure Settings
| Setting | Configuration |
|---|---|
| Standard | Log requests, discard if unable |
| RADIUS Attributes | Add vendor-specific attributes as needed |
| RADIUS Authentication | Ignore NAS-Port-Type if needed |
Configure UniFi Controller
Access UniFi Network Application
Navigate to your UniFi Controller (https://controller.unifi.local/) and log in.
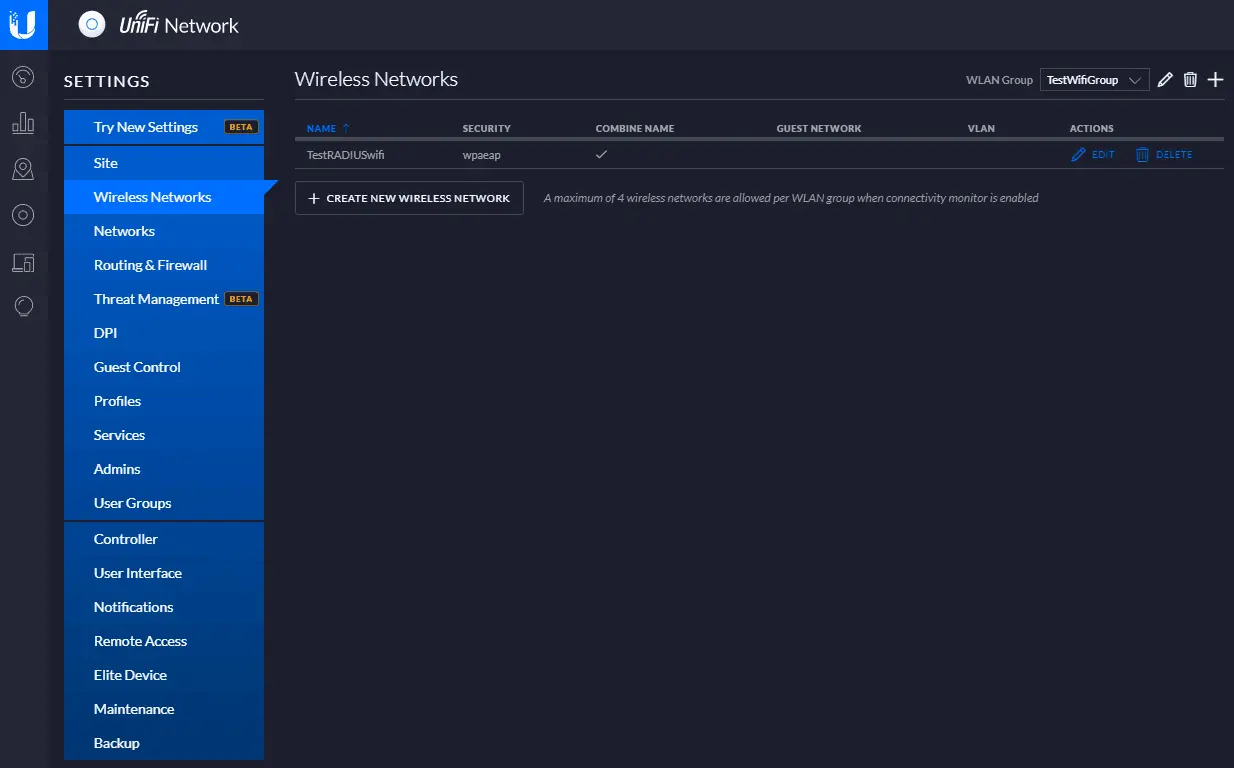
Create Wireless Network
- Go to Settings → WiFi
- Click Create New WiFi Network
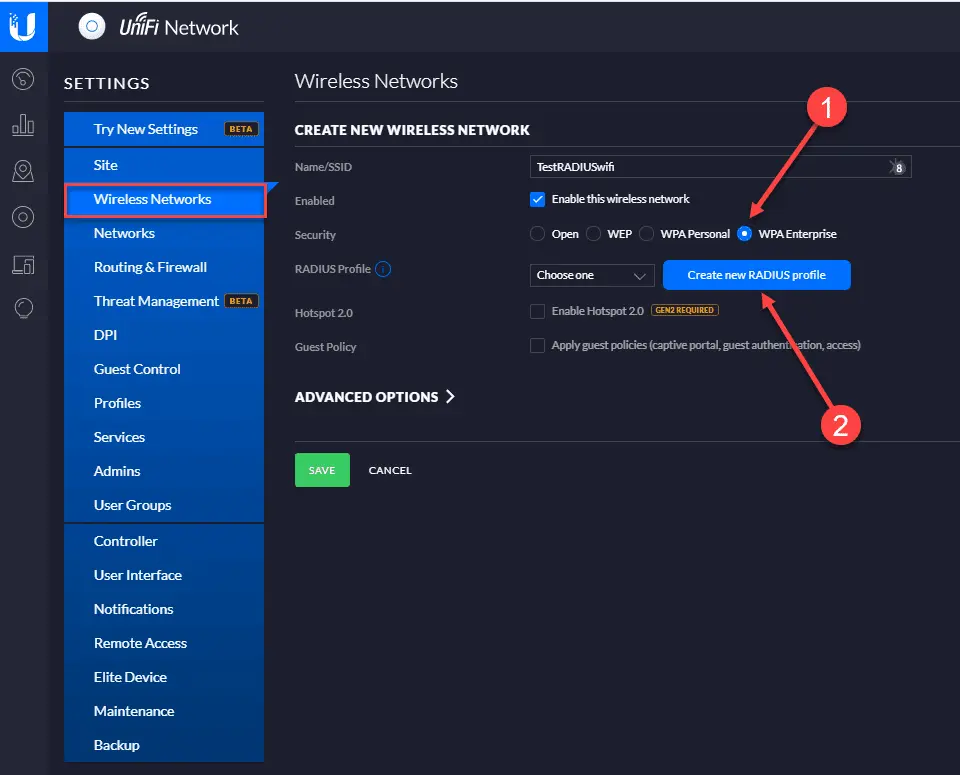
Configure SSID
| Setting | Value |
|---|---|
| Name (SSID) | Enterprise-WiFi |
| Security | WPA Enterprise |
| Authentication | RADIUS |
| Enable Security Settings | Yes |
Create RADIUS Profile
- Click Create New RADIUS Profile
- Configure the following:
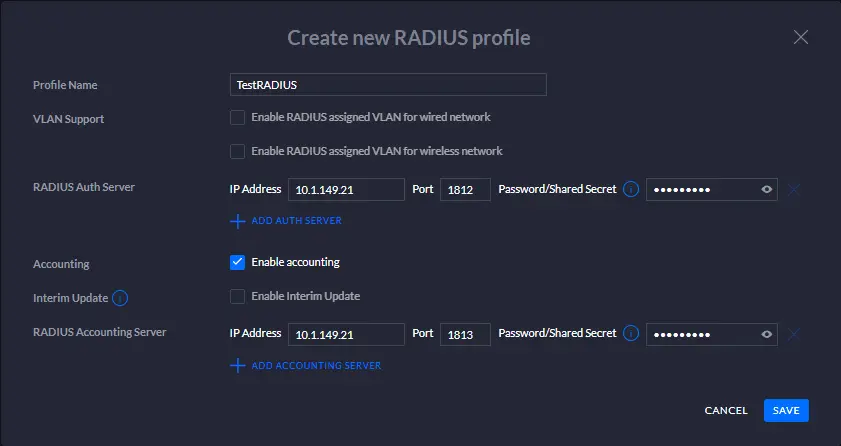
| Field | Value |
|---|---|
| Profile Name | Corporate-NPS |
| Authentication Server | 192.168.1.50 (NPS server IP) |
| Authentication Port | 1812 |
| Authentication Secret | [Your shared secret] |
| Accounting Server | 192.168.1.50 |
| Accounting Port | 1813 |
| Accounting Secret | [Your shared secret] |
Advanced Security Settings
For enhanced security in 2026:
| Setting | Recommended |
|---|---|
| PMF (Protected Management Frames) | Required |
| WPA3 Transition Mode | Enabled (if clients support) |
| Minimum Data Rate Control | Disable legacy rates (1, 2, 5.5, 11 Mbps) |
| Fast Roaming | Enabled (802.11r) |
| UAPSD | Enabled for voice optimization |
Apply Configuration
- Review settings
- Click Apply Changes
- Wait for APs to provision (may take 2-5 minutes)
Test Wireless Authentication
Windows Client
- Connect to the Enterprise-WiFi network
- Enter domain credentials when prompted
- Verify connection succeeds
# View wireless profiles
netsh wlan show profiles

# View detailed profile info
netsh wlan show profile name="Enterprise-WiFi" key=clear

# Test authentication
netsh wlan connect name="Enterprise-WiFi"
View NPS Logs
# View NPS logs
Get-EventLog -LogName "Security" -Source "IAS" -Newest 50

# Or use Event Viewer:
# Event Viewer → Windows Logs → Security → Filter by Source: IAS
UniFi Controller Logs
In UniFi Controller:
- Go to Insights or Logs
- Filter for authentication events
- Verify RADIUS authentication success
Troubleshooting
Common Issues
“The network password needs to be entered again”
Cause: Incorrect shared secret or RADIUS server unreachable
Solution:
- Verify shared secret matches on both NPS and UniFi
- Check firewall rules allow UDP 1812/1813
- Test connectivity:
Test-NetConnection <NPS-IP> -Port 1812
“Can’t connect to this network”
Cause: Certificate issues or EAP type mismatch
Solution:
- Verify NPS server has valid certificate
- Check EAP types match between NPS and client
- For PEAP, ensure server certificate is trusted
Authentication succeeds but no network access
Cause: VLAN configuration or authorization issues
Solution:
- Check NPS network policy allows the user group
- Verify VLAN assignment in UniFi
- Check switch port configuration
NPS Diagnostic Commands
# Check NPS service status
Get-Service IAS

# Restart NPS service
Restart-Service IAS

# View NPS configuration
Get-NpsConfiguration

# Test RADIUS client connectivity
Test-NetConnection -ComputerName <NPS-IP> -Port 1812
UniFi Diagnostic Commands
# SSH to UniFi AP
ssh admin@<ap-ip>

# View RADIUS statistics
cat /proc/sys/net/ipv4/conf/all/accept_redirects

# Check AP logs
tail -f /var/log/messages | grep -i radius
Security Best Practices for 2026
Certificate-Based Authentication (EAP-TLS)
Migrate from password-based (PEAP-MSCHAPv2) to certificate-based authentication:
- Deploy certificates to all devices via Intune or Group Policy
- Configure NPS to require EAP-TLS
- Disable password-based methods
NPS Hardening
# Enable NPS logging
Set-ItemProperty -Path "HKLM:\SYSTEM\CurrentControlSet\Services\RemoteAccess\Parameters\LogFileDirectories" `
  -Name "LogFiles" -Value "C:\Windows\System32\LogFiles\NPS"

# Configure account lockout policy
net accounts /lockoutthreshold:5 /lockoutduration:30
Network Segmentation
- Place wireless clients on separate VLAN
- Implement network access control (NAC)
- Use firewall rules to restrict wireless client access
Monitoring and Alerting
# Create scheduled task to monitor failed authentications
$action = New-ScheduledTaskAction -Execute "PowerShell.exe" `
  -Argument "-Command Get-EventLog -LogName Security -Source IAS -EntryType FailureAudit -Newest 10"
$trigger = New-ScheduledTaskTrigger -Daily -At 8am
Register-ScheduledTask -TaskName "NPS-Failure-Monitor" -Action $action -Trigger $trigger
Windows Server 2025 Enhancements
Windows Server 2025 introduces:
- Enhanced NPS logging with more detailed authentication data
- Improved certificate validation for EAP-TLS
- Better integration with Azure AD for hybrid scenarios
- TLS 1.3 support for RADIUS over TLS (RadSec)