How to migrate PostgreSQL databases to Google Cloud SQL?
In this post I will show you how you can migrate your PostgreSQL database to GCP Cloud SQL.
What is Cloud SQL?
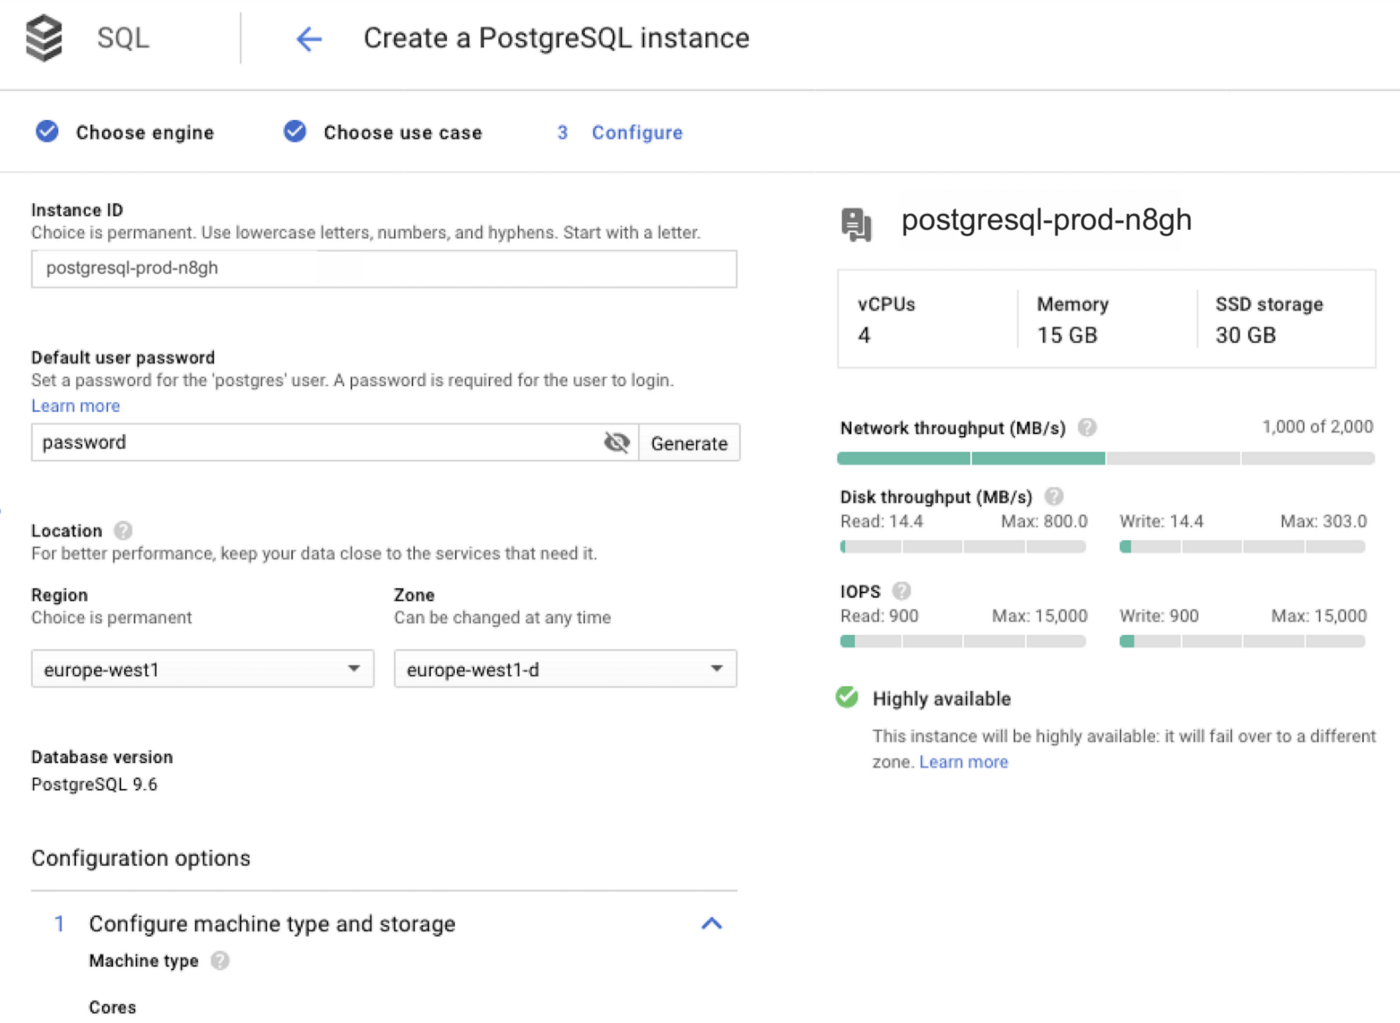
Create a PostgreSQL Instance
I will create the PostgreSQL instance called postgresql-prod-n8gh.
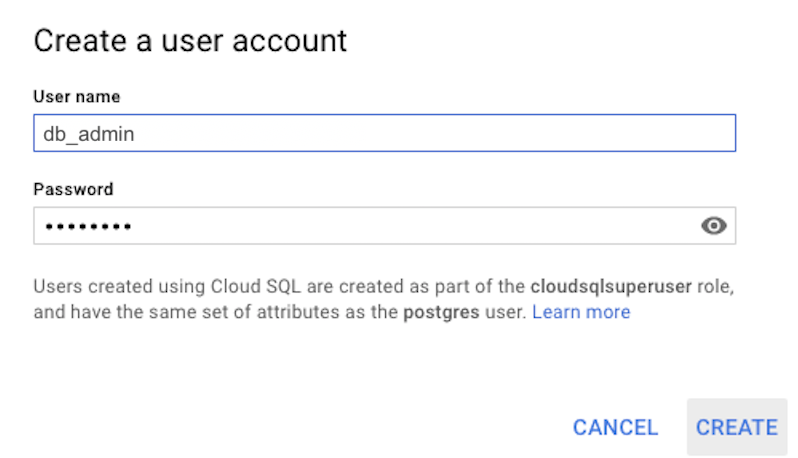
I will also create the db_admin user for postgresql-prod-n8gh instance in Google CloudSQL platform USERS section.
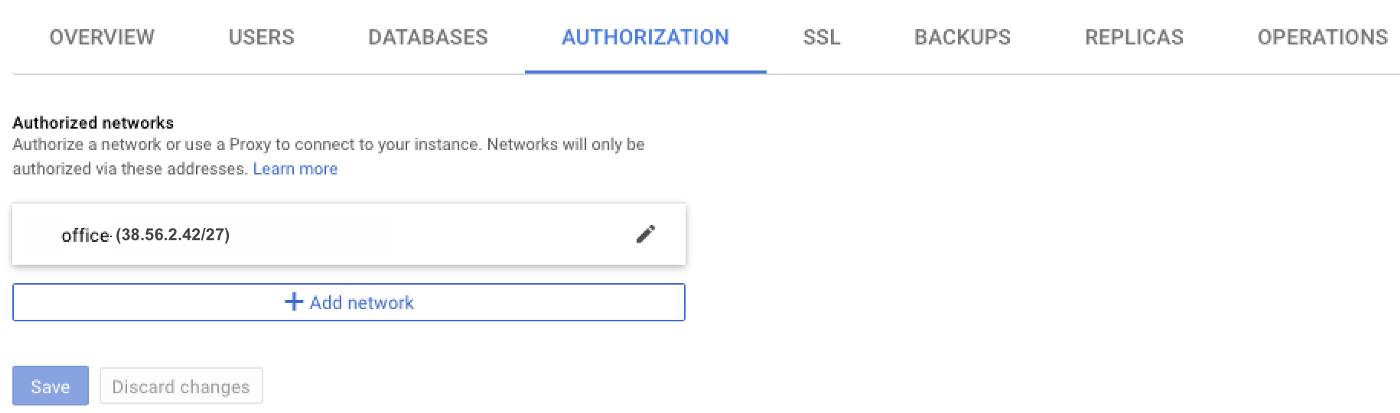
I will give the access my IP for connection in Cloud SQL platform AUTHORIZATION section.
I will log in with the db_admin user to postgresql-prod-n8gh.
psql -h 38.56.110.96 -U db_admin -d postgres -W
How to migrate?
You hawe to option to migrate to Cloud SQL. The first is the standard pg_dump. The second is Replication with Seamless Cutover.
Dump, Transfer, and Import
First, we would export the data using pg_dump.
pg_dump -U [USERNAME] --format=plain --no-owner --no-acl [DATABASE_NAME] \
| sed -E 's/(DROP|CREATE|COMMENT ON) EXTENSION/-- \1 EXTENSION/g' > [SQL_FILE].sql
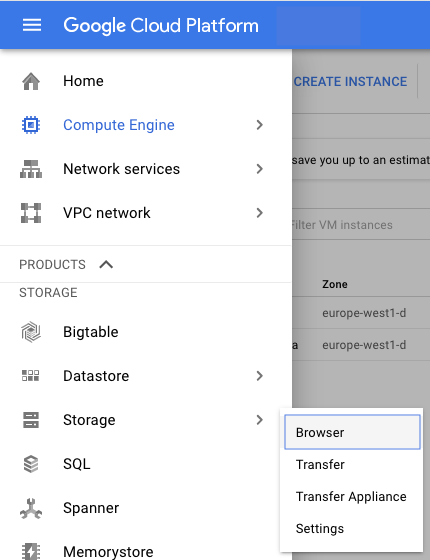
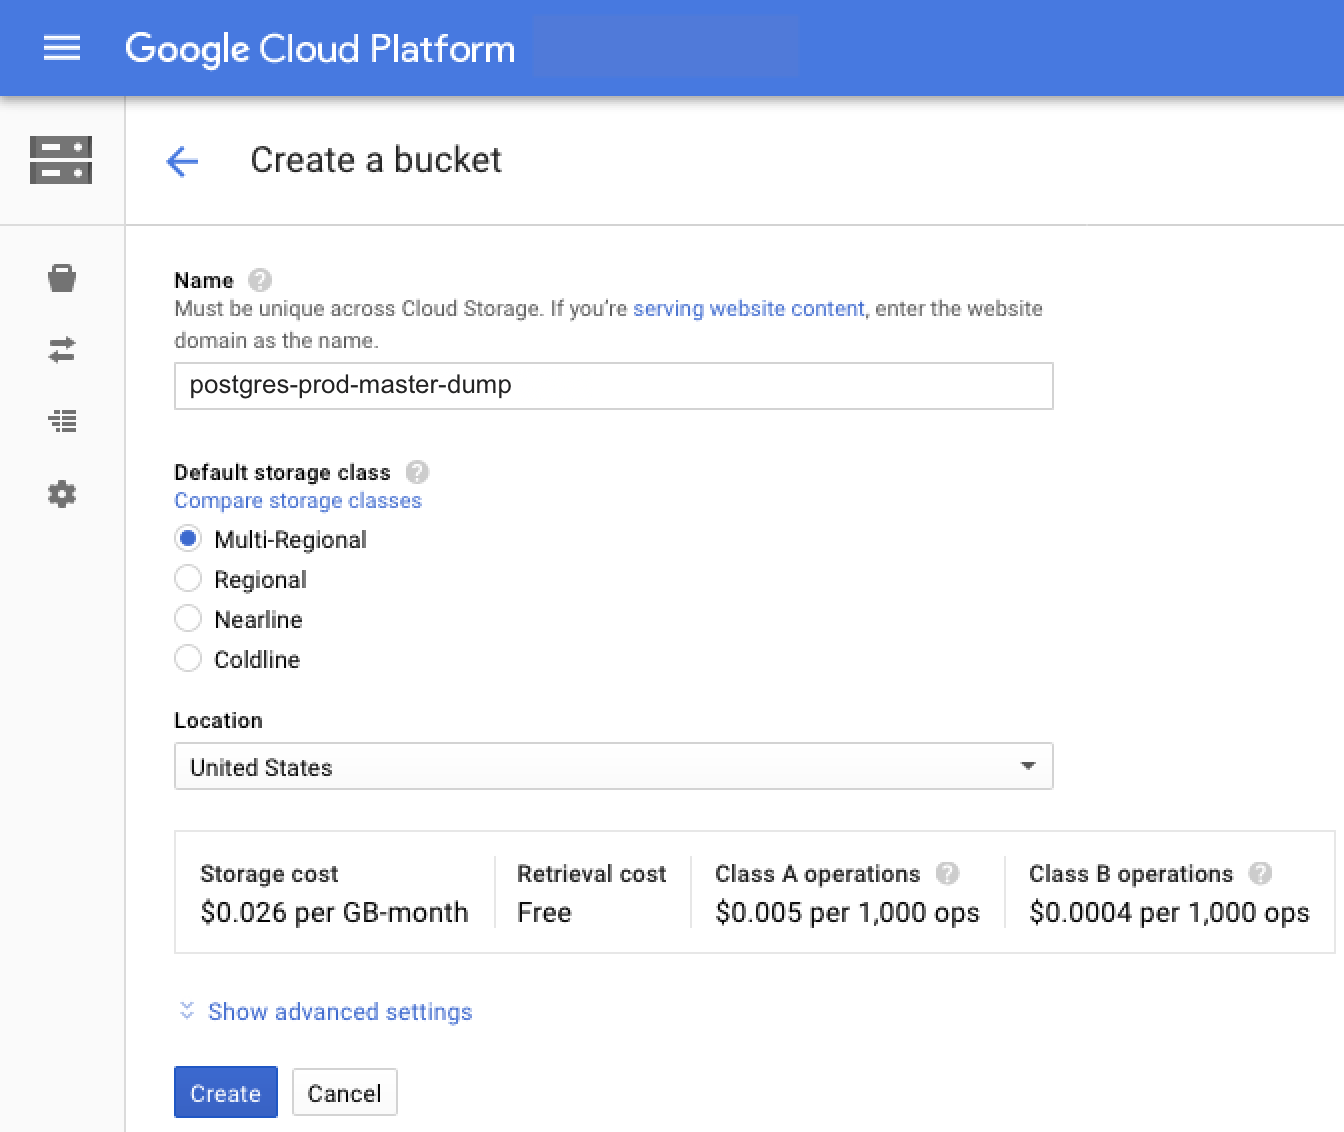
Then we have to transfer the dump to Google Cloud Storage. I will go to the Cloud Storage to create Bucket on Google Cloud Platform.
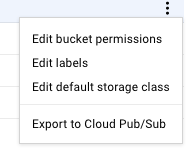
I will right-click on the postgres-prod-master-dump to edit bucket’s permissions.
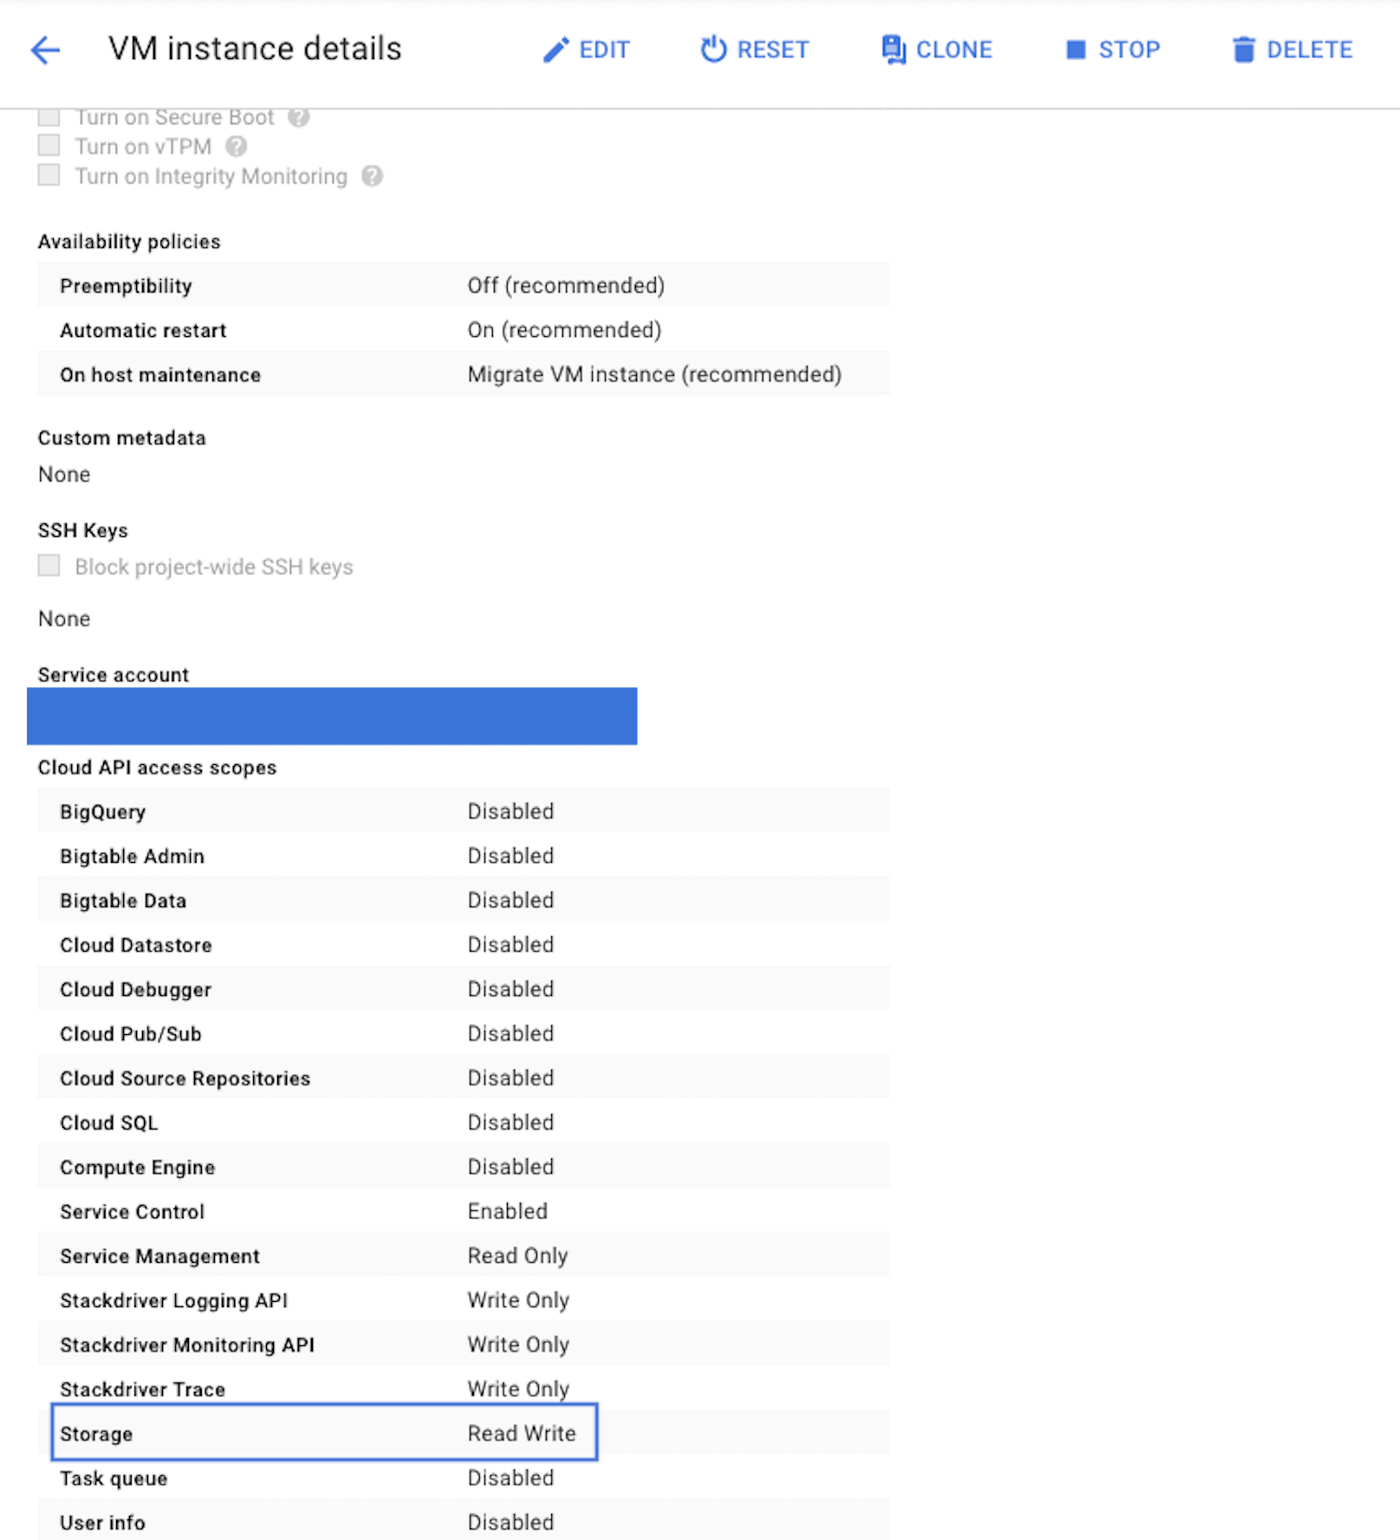
I need to change the Cloud API access scope of the remote-server instance to access and write to Cloud Storage.
I will run the following command for moving prod.sql dump to the postgres-prod-master-dump bucket in the remote-server instance.
gsutil cp prod.sql gs://postgres-prod-master-dump
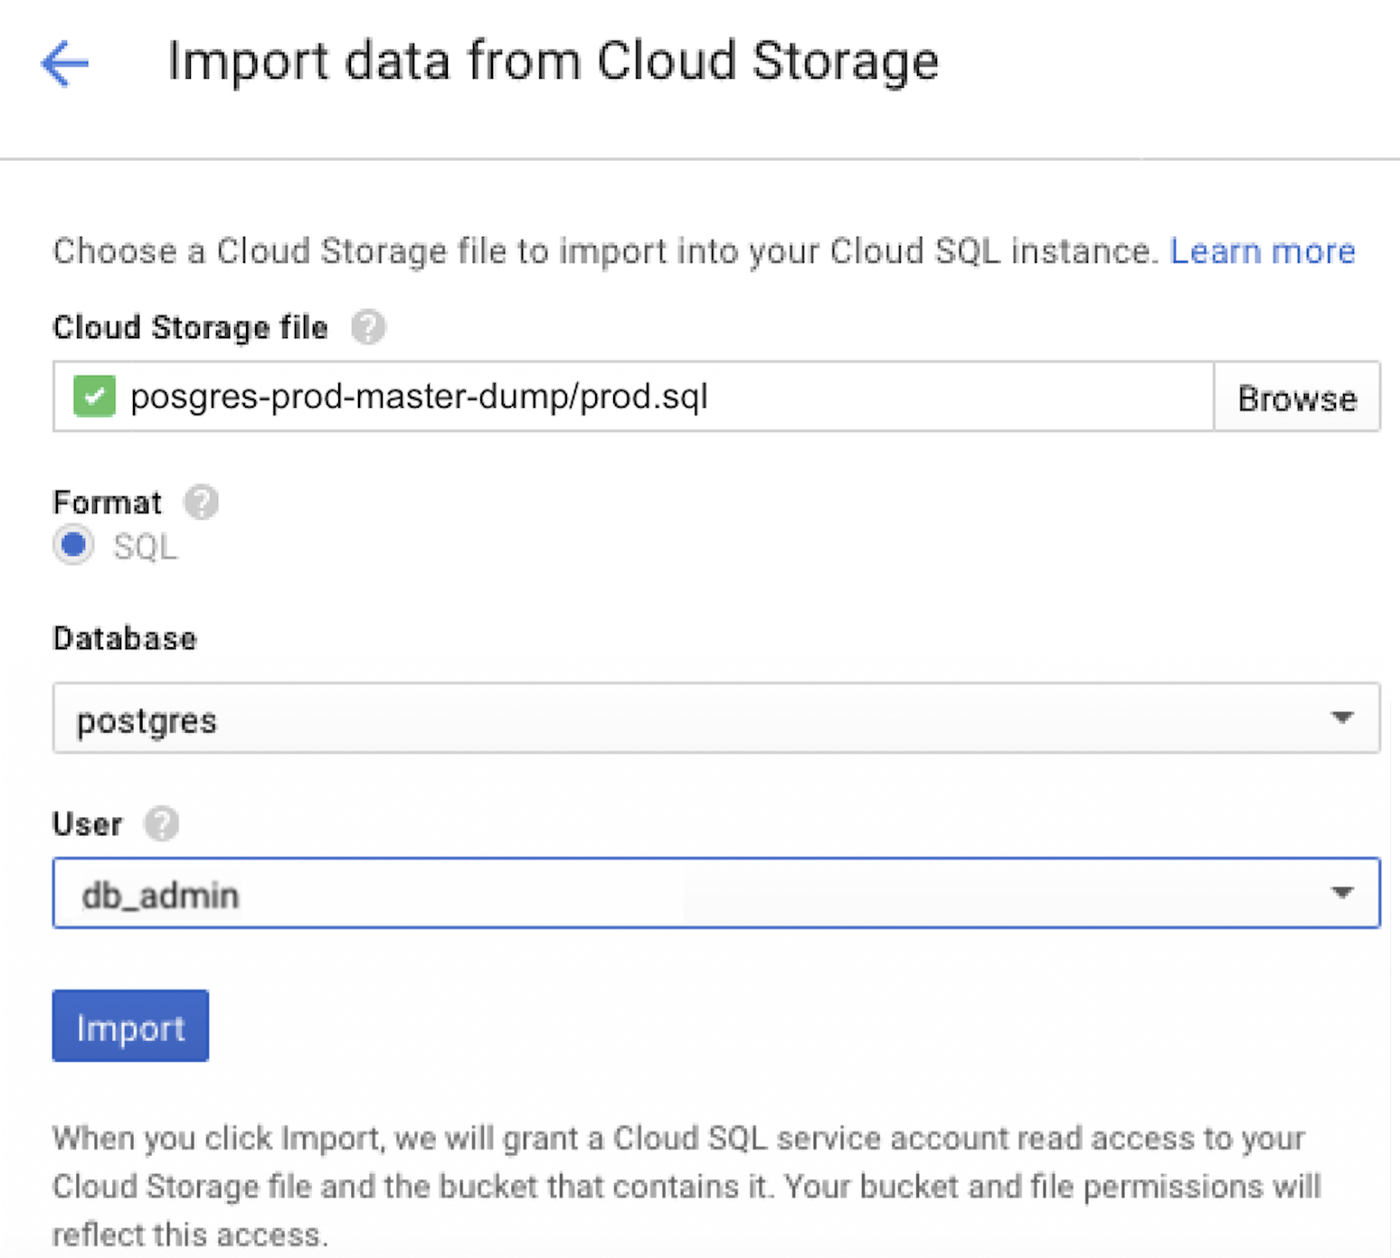
Finally, we would run the import. I will return back to the postgresql-prod-n8gh instance that created on Cloud SQL. I will click the IMPORT section in the Cloud SQL platform.

Replication with Seamless Cutover
The Database Migration service of GCP is a logical replication between source and destination database and then first take the full dump from source and restore it on destination, and then it also keep replicating the ongoing data from source to destination and keep destination in sync with source which avoid downtime, once we see there is no lag between both the databases (we can see it in dms console) we will promote the cloud sql instance and redirect the application to cloud sql.
First we need some configuration on the On-premise or self-managed source PostgreSQL server:
Install the pglogical package on the server.
apt install postgresql-11-pglogical -y

nano postgresql.conf
# logical replication
wal_level = logical
shared_preload_libraries = 'pglogical'
track_commit_timestamp = on
pglogical.conflict_resolution = 'last_update_wins'
Connect to the instance and set the following parameters, as needed:
sudo su - postgres
psql

ALTER SYSTEM SET shared_preload_libraries = 'pglogical';
ALTER SYSTEM SET wal_level = 'logical';
ALTER SYSTEM SET wal_sender_timeout = 0;


GRANT USAGE on public to replicator;
GRANT USAGE on pglogical to replicator;

\c backup_test
CREATE EXTENSION IF NOT EXISTS pglogical;
GRANT USAGE on SCHEMA pglogical to PUBLIC;
GRANT SELECT on ALL TABLES in SCHEMA pglogical to replicator;
GRANT SELECT on ALL TABLES in SCHEMA public to replicator;
GRANT SELECT on ALL SEQUENCES in SCHEMA public to replicator;
GRANT SELECT on ALL SEQUENCES in SCHEMA pglogical to replicator;

\c postgres
CREATE EXTENSION IF NOT EXISTS pglogical;
GRANT USAGE on SCHEMA pglogical to PUBLIC;
GRANT SELECT on ALL TABLES in SCHEMA pglogical to replicator;
GRANT SELECT on ALL TABLES in SCHEMA public to replicator;
GRANT SELECT on ALL SEQUENCES in SCHEMA public to replicator;
GRANT SELECT on ALL SEQUENCES in SCHEMA pglogical to replicator;
\q
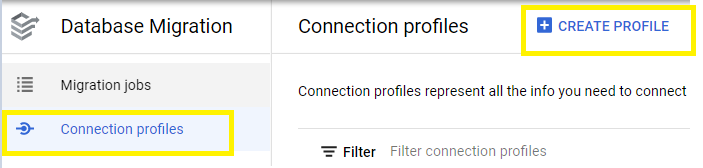
Now we need to create a source connection profile: Go to the Database Migration page in the Google Cloud Console and select Connection profiles page and click on create profile.
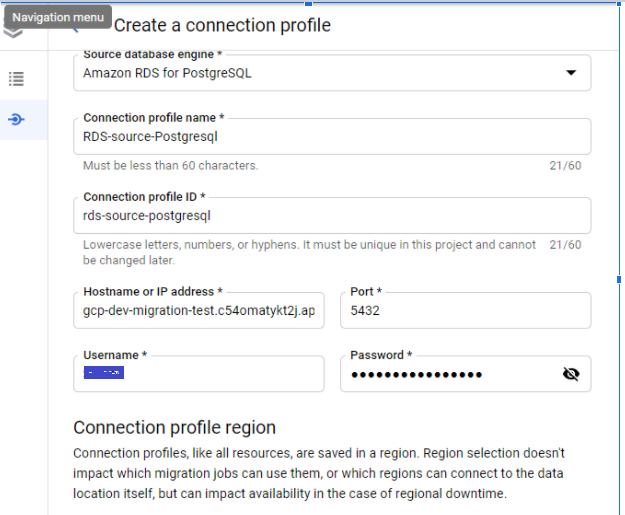
Select a Postgresql as Sourcedatabase engine. Enter hostname, port name, username and password to connect to the source database. Select the region and click on create.
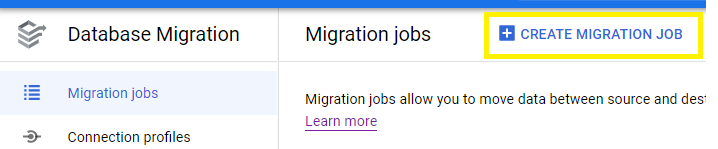
Now we can use this create profile to create a Migration jobs. Go to the Migration jobs page in the Google Cloud Console the click CREATE MIGRATION JOB at the top of the page.
Select the source database engine the select the destination region for your migration. This is where the Database Migration Service instance is created, and the new database engine will be created. Specify the migration job type: Continuous (snapshot + ongoing changes).
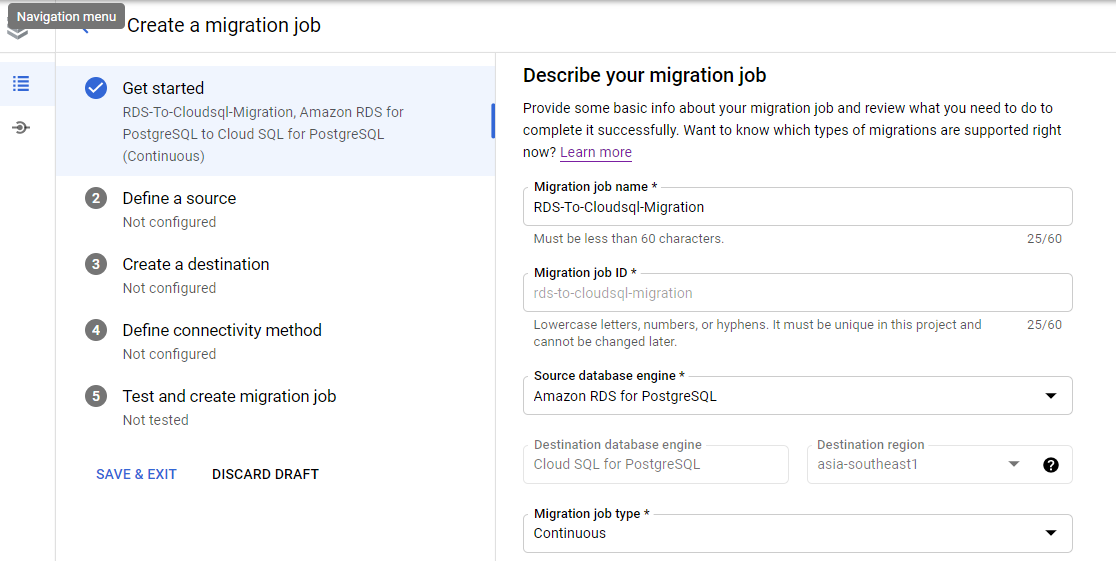
As we have already created a connection profile, then select it from the list of existing connection profiles.

Configure a Destination cloud sql instance
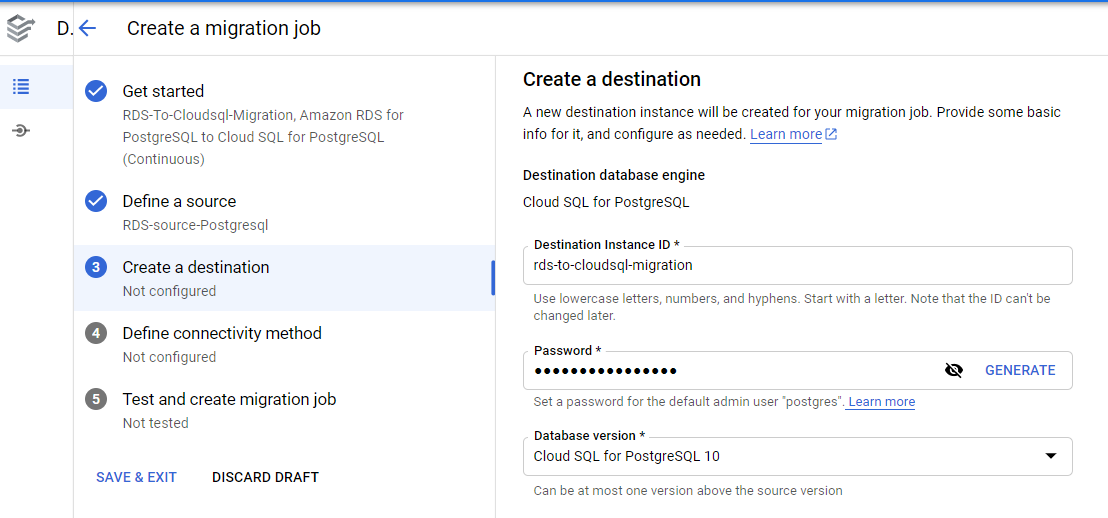
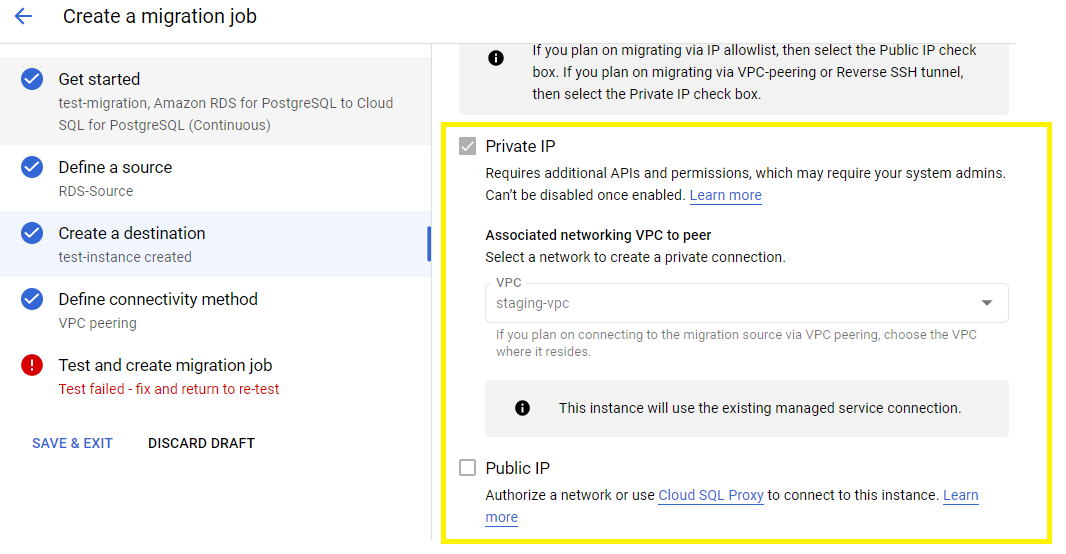
Choose whether to connect to this instance via private or public IP address. It is recommended to use Private IP. If you are using Private IP then select the VPC name as well, if you are using public IP just select it and move on to set the machine type.
Select the machine type for the Cloud SQL instance. The disk size must be equal to or greater than the source database size, make sure automatic storage increase is enabled.

Define connectivity method: From the Connectivity method drop-down menu, select a network connectivity method. This method defines how the newly created Cloud SQL instance will connect to the source database. If you have selected public ip at the time of destination instance creation then use the connectivity method as IP allowlist.
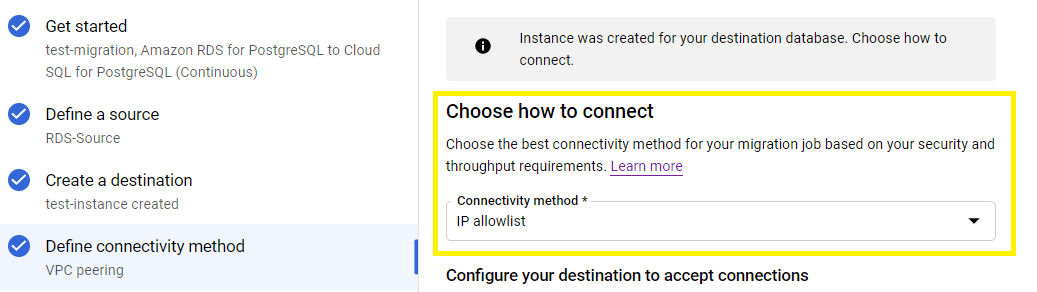
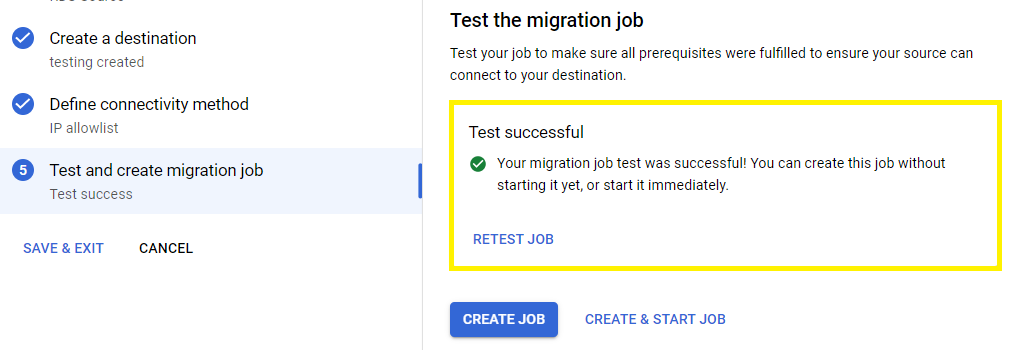
Test and create the migration job:
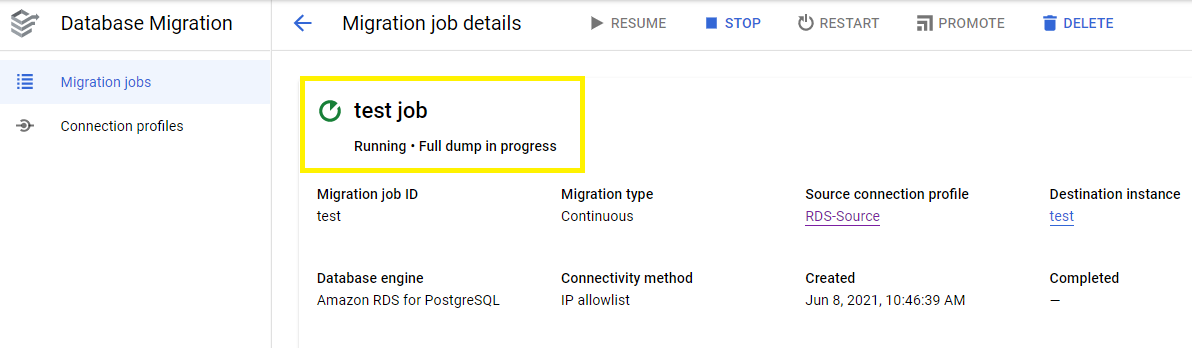
Once the job has been started after some time the status of job will be changes as below
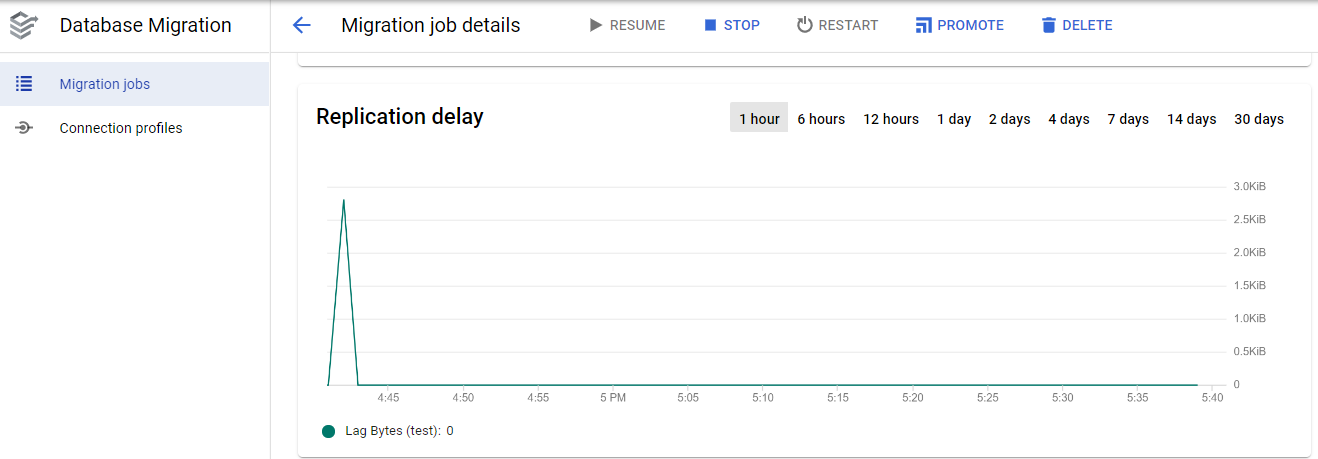
And then once dump and restore completed job status will be changed as below

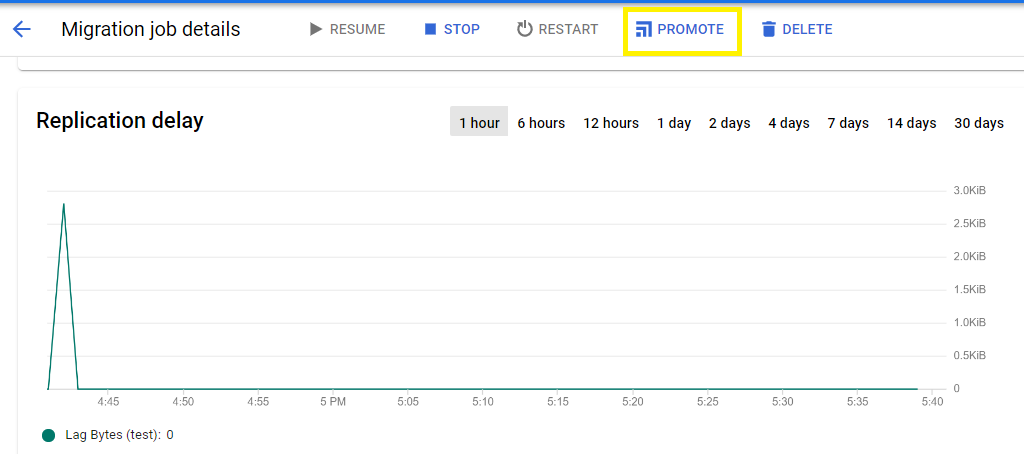
Once you see replication as 0 bytes for a long time, it means all the data has been migrated to the destination instance.
Promoting a migration: